Mac & Cheese Bacon Burger Rolls – The Ultimate Comfort Food Mashup! 🍔🧀
Food 30/03/2025 03:15
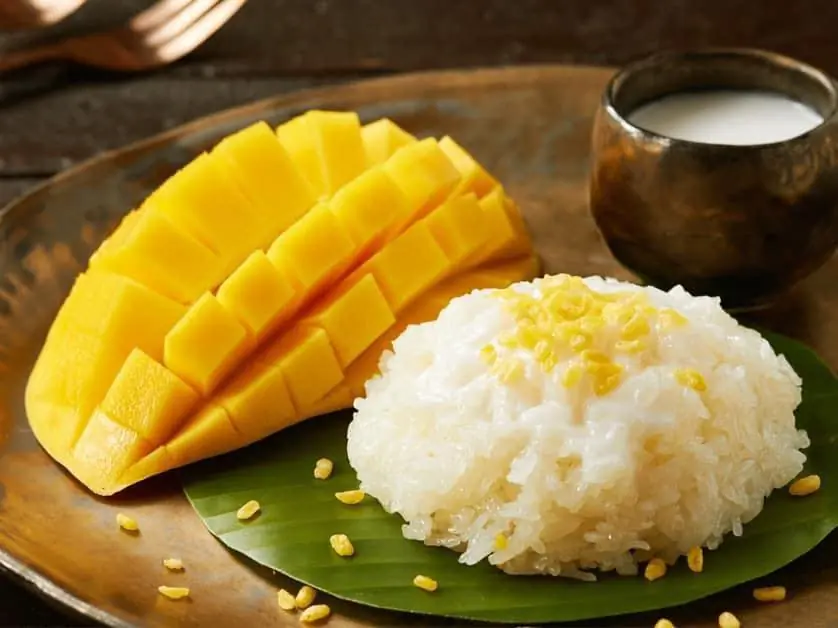
Thai Mango Sticky Rice is one of Thailand’s most famous and beloved desserts. It features sweet glutinous rice infused with creamy coconut milk, served alongside fresh ripe mango slices and drizzled with a luscious coconut sauce. The combination of soft, slightly chewy rice, juicy mango, and rich coconut cream creates a delightful balance of flavors and textures.
1 cup glutinous rice (also called sticky rice or Thai sweet rice)
1 teaspoon toasted sesame seeds (for garnish, optional)
½ cup coconut milk (full-fat for best flavor)
2 tablespoons granulated sugar
½ teaspoon salt
½ cup coconut milk
2 tablespoons granulated sugar
1 tablespoon cornstarch (for thickening)
¼ cup water
1 ripe mango, peeled and sliced
Shredded coconut (optional for extra texture)
Rinse the rice thoroughly in cold water 3-4 times until the water runs clear. This removes excess starch and prevents clumping.
Place the rinsed rice in a large bowl and cover with water. Let it soak overnight (6-8 hours) to achieve the perfect soft, sticky texture.
Drain the soaked rice and set it aside.
Line a steamer basket or bamboo steamer with cheesecloth or banana leaves.
Place the soaked rice on the cloth and fold it over the rice to cover it completely.
Steam over medium heat for 20-25 minutes, until the rice becomes tender and sticky.
Check for doneness by pressing a grain of rice between your fingers – it should be soft and slightly chewy.
In a small saucepan, heat ½ cup coconut milk over low heat (do not boil).
Stir in 2 tablespoons sugar and ½ teaspoon salt, mixing until fully dissolved.
Remove from heat and set aside.
Transfer the steamed sticky rice to a mixing bowl while it's still warm.
Pour the warm coconut milk mixture over the rice, stirring gently to coat evenly.
Cover and let the rice sit for 20-30 minutes to absorb the coconut milk and develop its signature creamy texture.
In a small saucepan, combine ½ cup coconut milk, 2 tablespoons sugar, and ¼ cup water.
Heat over medium-low heat until it simmers (do not let it boil).
In a separate bowl, mix 1 tablespoon cornstarch with 1 tablespoon water to create a slurry.
Slowly whisk the slurry into the warm coconut milk mixture.
Continue cooking for 1-2 minutes, stirring constantly, until the sauce thickens slightly.
Remove from heat and set aside.
Peel and slice the mango into thick or thin slices, depending on preference.
Scoop the coconut-infused sticky rice onto a serving plate or bowl.
Arrange the mango slices beside the sticky rice.
Drizzle the warm coconut sauce generously over the rice.
Sprinkle toasted sesame seeds or shredded coconut on top for extra flavor and crunch.
✅ Use Thai glutinous rice – Regular rice won’t provide the sticky texture needed.
✅ Choose ripe mangoes – Sweet, fragrant mangoes like Nam Dok Mai or Ataulfo work best.
✅ Do not boil the coconut milk – Overheating can cause the coconut milk to separate.
✅ Let the rice absorb the coconut milk – This enhances flavor and ensures a perfect creamy consistency.
✅ Make ahead option – The rice can be prepared in advance and reheated before serving.
Leftovers? Store in an airtight container in the fridge for up to 2 days.
To reheat, steam the rice or warm it in the microwave with a splash of coconut milk to restore its soft texture.
This creamy, tropical dessert is a delightful balance of sweet, salty, and creamy flavors, making it the perfect ending to any Thai meal. Whether you're making it for yourself or serving guests, this dish is sure to impress! 🍚🥭💛