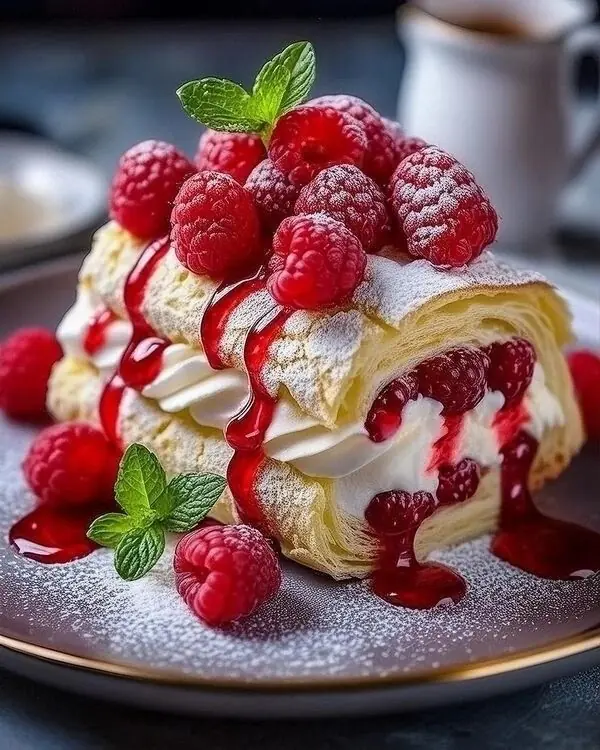
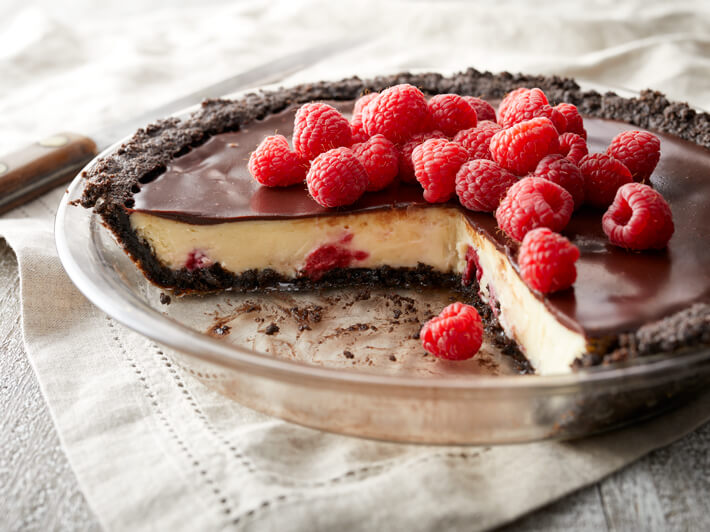
Chocolate Raspberry Cheesecake is a visual icon of "Artisanal Elegance." Its aesthetic power is rooted in the contrast between the pink internal swirls and the reflective, dark-red glaze. In 2026, it remains a top-tier dish for the "Heavy Pour" technique because the smooth, chilled surface of the cheesecake provides a stable, matte canvas that allows the high-gloss berry glaze to bead with extreme clarity.
The dish is defined by the "Marble-Swirl" technique, creating the pink interior, and the "Pectin-Stabilized" reduction that provides a high-gloss finish.
--------------------------------
Ingredients (Serves 8-12)
- 2 cups Oreo crumbs & 1/4 cup Melted Butter (for the base)
- 24 oz Cream Cheese & 1 cup Sugar (for the white filling)
- 1/2 cup Fresh Raspberry Puree (strained for pink swirls)
For the Raspberry Mirror (The Star)
- 1 cup Raspberry Juice (strained and seedless for ruby depth)
- 1/4 cup Light Corn Syrup (the secret for high-gloss reflection)
- 1 teaspoon Gelatin (bloomed for a 2026 Mirror gloss)
- 1 tablespoon Raspberry Liqueur (to deepen the red tones)
--------------------------------
Step-by-step cooking
Step 1 – Prepare the Base
Mix Oreo crumbs with melted butter. Press into a springform pan. Bake at 175°C (350°F) for 10 minutes to set the dark foundation.
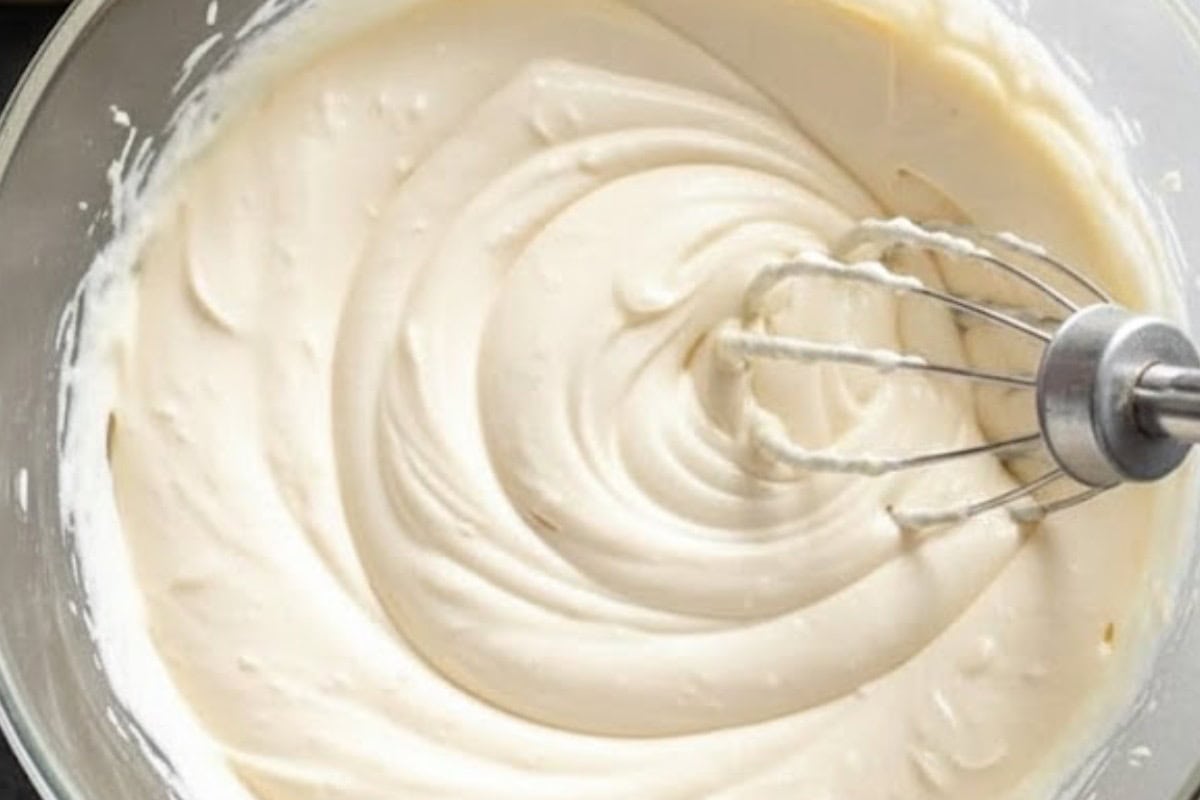
Step 2 – The White Filling
Whisk cream cheese and sugar until smooth. Pour into the prepared crust. Drop small amounts of raspberry puree on top and swirl with a skewer to create pink patterns.
Step 3 – The Set
Bake in a water bath until the center is set. Chill for 8 hours. The surface must be matte and cold to act as the perfect base for the berry pour.
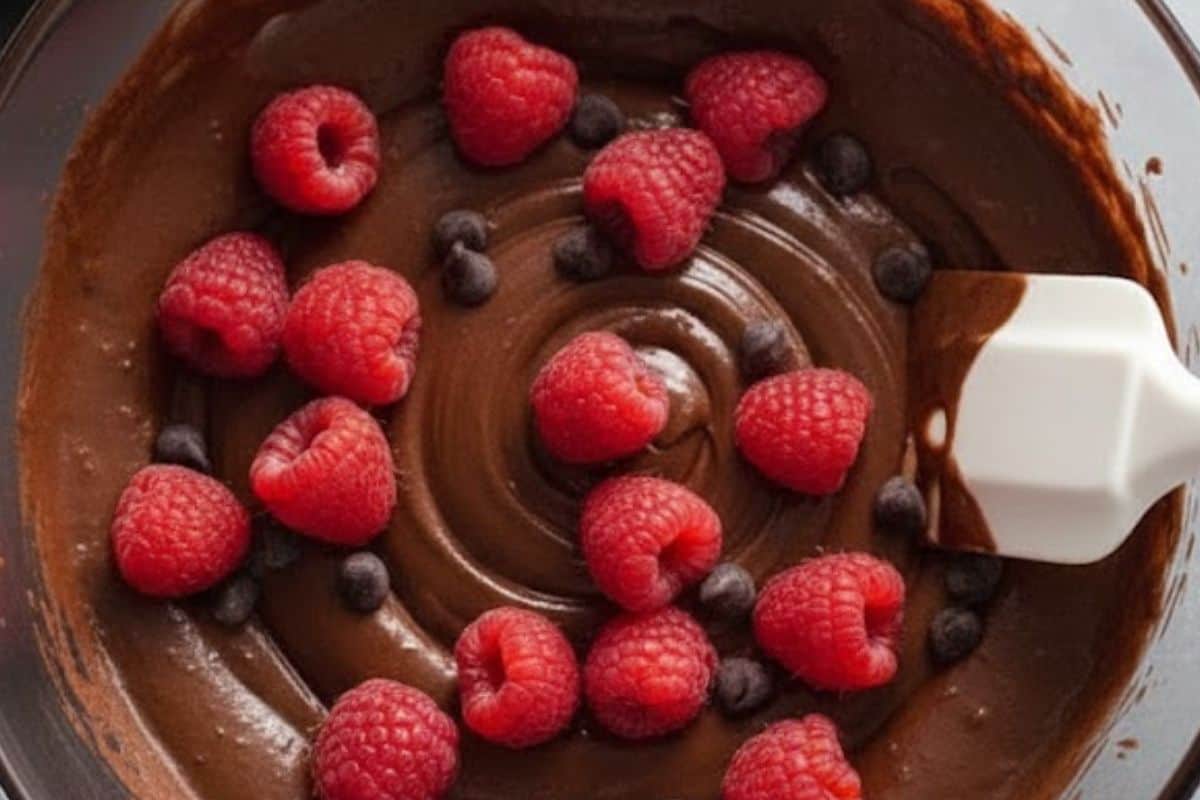
Step 4 – Build the Mirror
Heat raspberry juice, corn syrup, and liqueur. Whisk in the bloomed gelatin. The corn syrup is the secret to a high-gloss finish that reflects studio lights.
Step 5 – Achieve the Gloss
Whisk the glaze in small circles. This is the only way to achieve a "Lava-like" emulsion that is crystal-clear and ruby-red.
Step 6 – The Sieve Sift
Pass the glaze through a fine-mesh sieve. This is mandatory for a smooth look—no air bubbles or seeds should break the mirror surface.
Step 7 – Temperature Control
Let the glaze cool to 30°C (86°F). This ensures a thick, slow-moving pour that coats the white surface without running off too quickly.
Step 8 – The Arrangement
Place the cheesecake on a dark slate board to maximize the contrast between the white filling and red glaze.
Step 9 – The Heavy Pour (The Money Shot)
Slowly pour the warm, shimmering Raspberry Mirror directly over the center of the cheesecake, letting it flood the surface and cascade down the dark sides.
Step 10 – The Final Reveal
Capture the moment the red liquid beads on the white filling, creating a high-contrast visual of crimson against snow.
--------------------------------
Pro Tips
Using "Strained Puree" (Step 2) is mandatory; seeds will ruin the smooth cross-section and the slice reveal.
Raspberry Liqueur (Step 4) isn't just for flavor—it deepens the red color, making the high-gloss reflection pop more on camera.
Always use a hot, wet knife for the first slice (Step 10); this ensures the layers of dark crust, white filling, and red glaze remain distinct.
--------------------------------
Why This Performs
High-gloss "Raspberry Mirror" visual.
Pink vs. White vs. Dark color contrast.
Layered geometric texture.
Satisfying vertical-pour and marbled-reveal appeal.