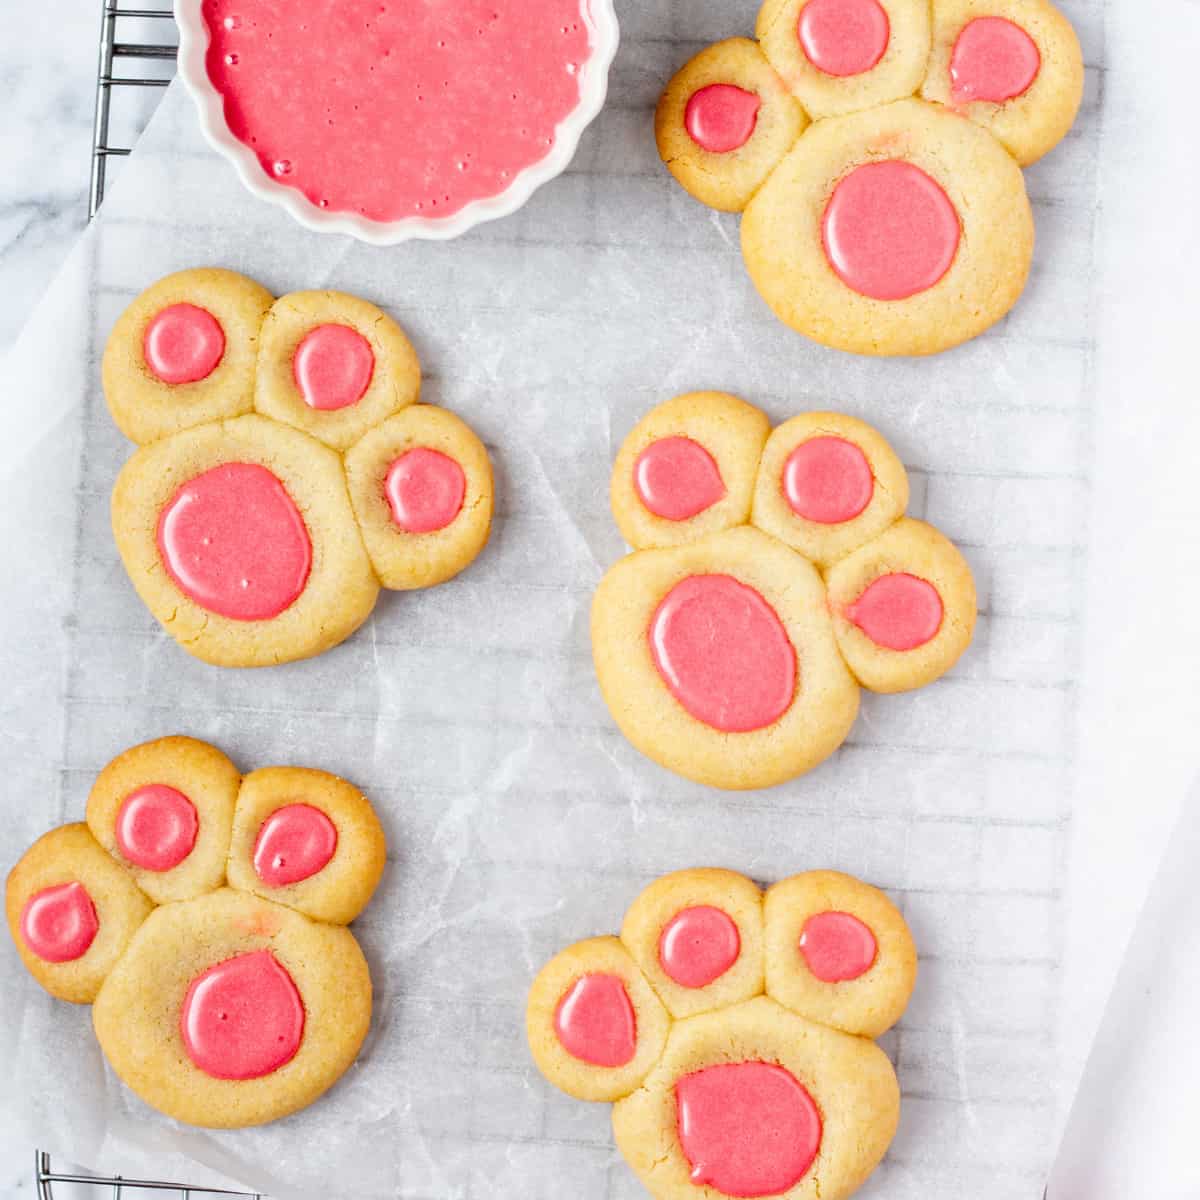
Bunny Pawprint Cookies – Shattered-Gold Shortbread with a High-Gloss Pink Mirror
Bunny Pawprint Cookies are a visual icon of "Whimsical Precision." Their power comes from the **"Pink-on-White"** effect—the contrast between the **vibrant-pink pads** and the **reflective, snow-white base**. In 2026, it remains a top-tier "Heavy Pour" dish because the gelatin-stabilized berry glaze creates a thick, glass-like lacquer that highlights the clean, rounded lines of the paw design.
The dish is defined by the "Thumbprint-Indentation" technique, creating a shattered-gold exterior, and the "Berry-Emulsion" that provides a high-gloss, mirror-like finish. -------------------------------- Ingredients (Makes 12)
- 1 cup Unsalted Butter (softened for "Shattered-Gold" texture) - 1/2 cup Sugar & 2 cups All-purpose Flour - 1 cup Royal Icing or Marshmallow Fluff (for "Snow-White" base)
For the "Mirror" Pink Pour (The Star) - 1/2 cup Strawberry Puree (strained for "Vibrant-Pink" depth) - 1/4 cup Light Corn Syrup (the secret for "High-Gloss" reflection) - 1 teaspoon Gelatin (bloomed for "2026 Mirror" gloss) - 1 drop Pink Food Gel (for "Vibrant-Neon" pop)
Step 1 – The "Shatter" Prep Cream butter and sugar. Form into rounds. Use your thumb to make one large and three small indentations. Bake at 175°C (350°F) until the edges are "Shattered-Gold."
Step 2 – The Snow-White Silk Fill the center of the cookie and the toe indentations with royal icing. It must be "Liquid-Silk" smooth and perfectly white to act as the "Reflector" for the pink pour.
Step 3 – Build the Pink Silk Heat strawberry puree and corn syrup. Whisk in bloomed gelatin and pink gel. The corn syrup is the "secret weapon" for a high-gloss finish that reflects studio lights.
Step 4 – Achieve the Gloss Whisk the glaze in small circles. This is the only way to achieve a "Lava-like" emulsion that is "Crystal-Clear" and vibrant pink. Step 5 – The Sieve Sift Pass the glaze through a fine-mesh sieve. This is mandatory for a "Liquid-Silk" look—no strawberry seeds should break the mirror surface.
Step 6 – The Set Let the "Snow-White" base dry completely. This ensures a "Strict-Geometric" line between the white and pink during the pour.
Step 7 – The Arrangement Place the cookies on a light-grey marble board to make the "Vibrant-Pink" and "Shattered-Gold" tones explode.
Step 8 – The Heavy Pour (The Money Shot) Slowly pour the warm, shimmering Pink Mirror directly into the indentations using a precision spout, letting it flood the white base and bead at the edges.
Step 9 – The Final Reveal Capture the moment the pink liquid "beads" on the white icing, creating a high-contrast visual of neon against snow. Step 10 – The Garnish Add a dusting of powdered sugar around the base for a "Shattered-Salt" effect and extra "Vitality."
-------------------------------- Pro Tips Using "Light Corn Syrup" (Step 3) is mandatory; without it, the pink glaze will look "flat" and matte on camera instead of "High-Gloss." The "Fine-Mesh Sieve" (Step 5) is the only way to get a "2026 Mirror" finish; even one seed will ruin the "Satisfying" slow-motion pour. Always pour the glaze while it is at 30°C (86°F); if it's too warm, it will overflow the "Snow-White" boundaries and ruin the paw shape.
-------------------------------- Why This Performs High-gloss "Pink Mirror" glaze visual. Vibrant Pink vs. Snow-White vs. Shattered-Gold color contrast. Shattered-crust "Shortbread" texture. Extreme "Satisfying" precision-pour and festive-reveal appeal.