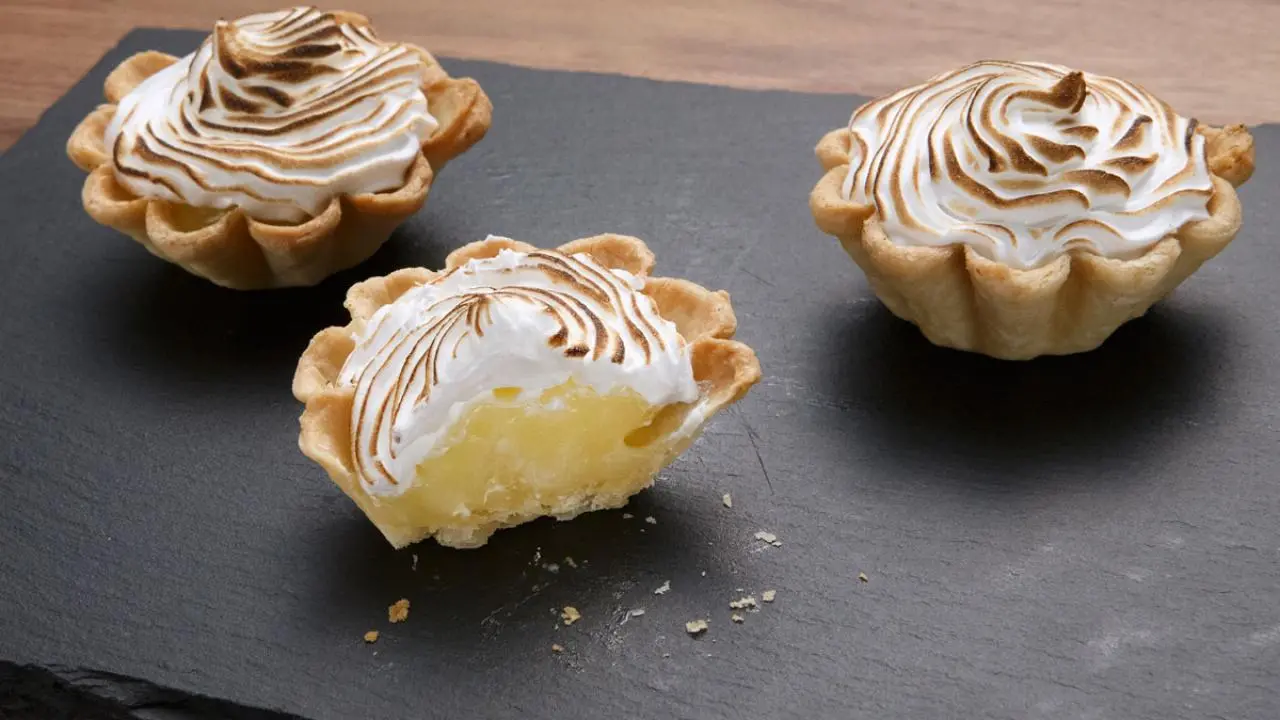
Mini Lemon Meringue Tarts – Zesty Citrus Curd with a Toasted Meringue Cloud
Mini Lemon Meringue Tarts are a visual icon of "Boutique Baking." Their power comes from the **Sharp Color Blocking**: the neon yellow of the lemon, the snowy-white of the meringue, and the toasted amber of the peaks. For a home cook, these are the ultimate "Heavy Pour" aesthetic because you can watch the thick, glossy curd fill the tiny crusts like liquid gold.
The dish is defined by the "Torched Peak" technique, where a quick blast of heat turns the soft white meringue into a "shattered-glass" amber crust on the outside while staying marshmallow-soft inside. -------------------------------- Ingredients (Makes 12 Minis)
For the "Gold" Shells (Easy Version) - 1 pack Pre-made Mini Tart Shells (or Shortcrust pastry) - 1 tablespoon Melted Butter (to brush for "Extra Gloss")
For the Neon Lemon Curd (The Star) - 2 Large Egg Yolks - 1/2 cup Sugar - 1/4 cup Fresh Lemon Juice - 2 tablespoons Butter (cold) - 1 teaspoon Lemon Zest
For the Meringue "Cloud" - 2 Egg Whites (at room temperature) - 1/2 cup Superfine Sugar
Step 1 – Pre-Bake the "Gold" Blind bake your tart shells according to the package. Brush the inside with melted butter 2 minutes before finishing to get that "High-Gloss" interior.
Step 2 – The 10-Minute Curd In a small saucepan over low heat, whisk egg yolks, sugar, and lemon juice. Whisk constantly until it thickens into a "Lava-like" consistency. Step 3 – The Silk Finish Remove from heat and stir in the cold butter. This is the secret to a "2026 Mirror" finish—it makes the curd reflect light perfectly.
Step 4 – The Heavy Fill While the curd is warm and fluid, use a spoon to "pour" it into the shells. It should settle with a perfectly flat, glass-like surface. Let them chill.
Step 5 – Build the "Cloud" Whisk egg whites until soft peaks form. Slowly add sugar, whisking until the mixture is thick, glossy, and "Snow-White."
Step 6 – The Peak Placement Pipe or spoon a tall "mountain" of meringue onto each tart. Use the back of a spoon to pull up "jagged" peaks for texture.
Step 7 – The Flash Torch Use a kitchen torch (or a quick 1-minute broil in the oven) to brown only the tips of the meringue.
Step 8 – Achieve the "Toast" The peaks should turn a dark, "Shattered-Amber" color while the valleys stay pure white.
Step 9 – The Arrangement Line up the tarts on a clean white platter to emphasize the "Neon Yellow" edges peeking out.
Step 10 – The Final Reveal Slice one in half to show the contrast between the crispy shell, the "flowy" curd, and the marshmallow cloud. -------------------------------- Pro Tips Don't use bottled lemon juice; fresh juice is the only way to get that "Electric Yellow" color naturally. Whisk your meringue until it's "shaving-cream" thick; if it's too runny, you won't get those high-impact peaks for the camera. Fill the tarts while the curd is still warm so it levels itself out into a "Mirror" finish.
-------------------------------- Why This Performs High-gloss "Lemon Mirror" visual. Neon Yellow vs. Snow-White vs. Toasted Amber color contrast. Shattered-gold "Shortcrust" texture. Extreme "Satisfying" bite-sized aesthetic.